Microgreens, the young vegetable greens that are taking the culinary world by storm, are packed with flavour, nutrition, and vibrant colours. These miniature plants, typically harvested when they are just 1–3 inches tall, offer a unique combination of benefits, making them a favourite among chefs, health enthusiasts, and home gardeners alike.
What Are Microgreens?
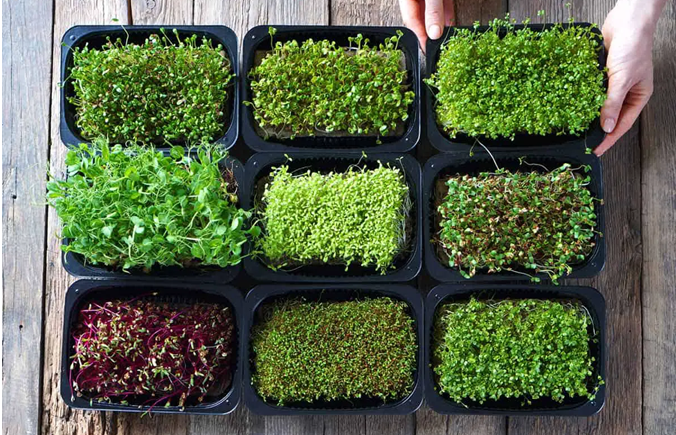
Microgreens are the young seedlings of vegetables and herbs, harvested 7-21 days after germination, when the first true leaves have emerged. They should not be confused with sprouts, which are grown differently and do not develop leaves. Unlike baby greens, which are harvested at a later stage, microgreens are harvested much earlier, while still delivering a punch of flavor and nutrients. They can be grown in a variety of settings, including outdoors, in greenhouses, or even on a sunny windowsill.
The Benefits of Microgreens
- Ease of Growth: Microgreens are exceptionally easy to cultivate. They require minimal space and can be grown indoors or outdoors, making them accessible to everyone, even those without a traditional garden.
- Quick Harvest: Microgreens are ready to harvest in just 7-21 days, providing a fast turnaround from planting to plate.
- Flavour Concentration: Despite their small size, microgreens are packed with intense flavours, adding a gourmet touch to any dish.
- Nutrient Density: These tiny greens are nutritional powerhouses. Some microgreens contain up to 40 times more vitamins and minerals than their mature counterparts.
Growing Microgreens at Home
Growing microgreens at home is simple and requires only a few basic materials:
- Seeds: Use seeds specifically intended for microgreens.
- Soil: Choose a high-quality, organic potting soil free from chemicals and pesticides.
- Containers: Use shallow trays or pots that are about 4-5 inches deep.
- Light: Ensure the microgreens receive 3-4 hours of natural sunlight daily. A sunny windowsill or balcony is ideal.
- Water: Keep the soil consistently moist using a hand sprinkler to avoid over-watering.
Steps to Cultivate Microgreens
- Prepare the Container: Fill your container with 3-4 inches of soil.
- Sow the Seeds: Evenly sprinkle the seeds over the soil surface.
- Cover the Seeds: Lightly cover the seeds with a thin layer of soil and gently press down.
- Moisten the Soil: Spray water to ensure the soil is damp but not waterlogged.
- Germination: Keep the container at room temperature for about two days until germination, and then move it to a sunny spot.
- Regular Watering: Water the growing greens twice a day.
- Harvest: Once the microgreens reach 2-3 inches in height, cut them just above the soil line.
- Wash and Store: Rinse the harvested microgreens with cold water, dry them, and store in a paper towel-lined container in the refrigerator.
Popular Varieties of Microgreens
Microgreens come in a wide array of varieties, each offering unique flavors and textures. Popular options include:
- Vegetables: Cauliflower, broccoli, cabbage, radish, carrot, beetroot, spinach.
- Herbs: Basil, cilantro, parsley.
- Cereals: Rice, oats, wheat, corn, barley.
- Legumes: Chickpeas, beans, lentils.
Their flavors can range from mild to spicy, and even slightly sour or bitter, depending on the type.
Enjoying Microgreens
Microgreens are incredibly versatile in the kitchen. They can be:
- Eaten raw in salads for maximum nutritional benefit.
- Used as garnishes for soups and dishes.
- Added to sandwiches, burgers, and wraps.
- Blended into smoothies.
- Used as toppings for pizzas and other dishes.
Microgreens are more than just a culinary trend—they are a nutritious, flavourful, and easy-to-grow addition to any diet. Whether you’re a seasoned gardener or just getting started, microgreens offer a rewarding way to enjoy fresh, home-grown greens all year round. Their rapid growth and high nutrient content make them an excellent choice for anyone looking to enhance their meals with fresh, vibrant ingredients.
(Author is Assistant Professor, Krishi Vigyan Kendra Bandipora-1, SKUAST Kashmir)